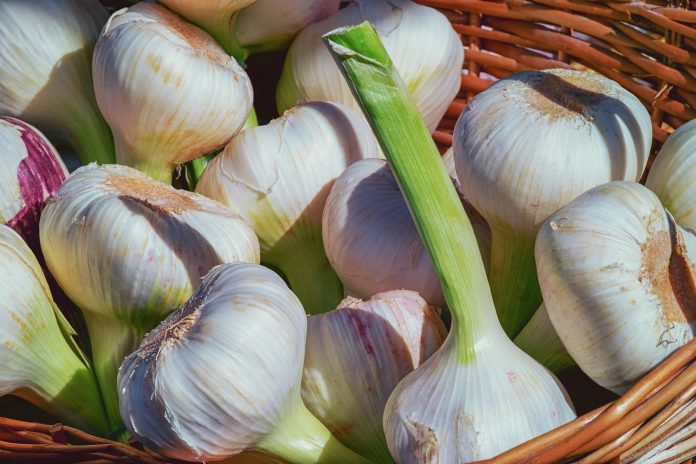
Growing garlic in Northeast Ohio provides superior flavor, variety options and significant cost savings compared to store-bought alternatives. The region’s climate suits garlic cultivation perfectly, requiring only proper timing and variety selection.
Why Grow Your Own Garlic
Homegrown garlic offers flavor intensity impossible to find in grocery stores. Fresh-harvested bulbs provide complex taste profiles that diminish during long-term commercial storage and shipping.
Northeast Ohio gardeners can grow hardneck varieties unavailable in most stores. These cold-hardy types produce scapes – edible flower stalks that add another dimension to your harvest.
Best Varieties for Northeast Ohio
Hardneck Varieties (Recommended) Our Zone 6 climate suits hardneck garlic perfectly. These varieties require cold winter temperatures for proper bulb development.
German Extra Hardy (Rocambole) Excellent for beginners, this variety tolerates various soil conditions while producing rich, full-bodied flavor. Bulbs store 4-6 months with proper curing.
Music (Porcelain) Large, easy-to-peel cloves with hot, spicy flavor that mellows beautifully when cooked. Consistently produces impressive bulb sizes in Northeast Ohio conditions.
Chesnok Red (Purple Stripe) Purple-striped bulbs offer complex flavor with moderate heat. Particularly well-suited to our climate variations and soil types.
Softneck Varieties (Limited Success) Softneck varieties prefer warmer climates and may not bulb properly in Northeast Ohio’s cold winters. Stick with hardneck varieties for reliable results.
Planting Timeline
October Planting Plant garlic cloves 4-6 weeks before hard frost, typically mid-to-late October in Northeast Ohio. This timing allows root development before winter dormancy.
Site Preparation Choose locations with full sun and excellent drainage. Garlic won’t tolerate waterlogged soil, especially during winter months.
Work compost or aged manure into planting beds several weeks before planting. Avoid fresh manure which can burn developing roots.
Soil Requirements
pH Levels Garlic thrives in slightly alkaline soil with pH between 6.0-7.0. Test soil pH in late summer and amend if necessary using lime to raise pH or sulfur to lower it.
Drainage Essential for success. Heavy clay soils require raised beds or added organic matter to improve drainage. Sandy soils may need compost to retain moisture.
Fertility Garlic benefits from rich, fertile soil. Apply balanced organic fertilizer or compost before planting, then side-dress with nitrogen in early spring.
Planting Technique
Clove Selection Plant only the largest, healthiest cloves from each bulb. Small cloves produce small bulbs. Save smaller cloves for cooking rather than planting.
Spacing and Depth Plant cloves pointed end up, 2 inches deep and 4-6 inches apart in rows spaced 12 inches apart. Proper spacing prevents overcrowding and disease issues.
Mulching Apply 4-6 inches of straw mulch after planting to suppress weeds and regulate soil temperature. Remove excess mulch in early spring to allow soil warming.
Growing Season Care
Spring Emergence Garlic shoots emerge in early spring as soil warms. Side-dress with nitrogen fertilizer when shoots reach 6 inches tall for optimal bulb development.
Watering Provide consistent moisture during spring growth but reduce watering as harvest approaches. Overwatering near harvest can cause bulb rot.
Scape Removal Remove flower stalks (scapes) when they curl once or twice. This directs energy into bulb development rather than seed production. Harvest scapes for cooking – they offer mild garlic flavor.
Pest and Disease Management
Common Issues White rot and bulb mites pose the biggest threats to garlic crops. Proper drainage and crop rotation help prevent these problems.
Prevention Never plant garlic in areas where onions or garlic grew the previous year. Four-year rotation cycles reduce disease pressure significantly.
Harvesting
Timing Harvest when lower leaves turn brown but 5-6 green leaves remain, typically mid-July in Northeast Ohio. Don’t wait too long – overripe bulbs split and store poorly.
Method Carefully dig bulbs with a fork, brush off soil but leave roots and stems attached for curing. Handle gently to avoid bruising.
Curing and Storage
Initial Curing Cure harvested garlic in a warm, dry, well-ventilated area for 2-3 weeks. Proper curing is essential for long-term storage.
Final Preparation After curing, trim roots and cut stems to 1 inch above the bulb. Store in mesh bags or braids in cool, dry locations.
Seed Stock Save the best bulbs for next year’s planting. Homegrown garlic adapts to your specific growing conditions over time, improving performance annually.
Economic Benefits
A single planted clove typically produces a bulb with 6-8 cloves, multiplying your investment eight-fold. Specialty hardneck varieties cost $20-30 per pound in stores but cost pennies per bulb to grow.
Getting Started
Purchase seed garlic from reputable suppliers rather than using grocery store garlic, which may be treated to prevent sprouting. Order early – the best varieties sell out by late summer.
Start small with 2-3 varieties to learn which perform best in your specific conditions. Success with garlic encourages expansion into other homegrown vegetables.
This concludes Garlic Week. From shopping and storage through preparation and growing, you now have complete knowledge to transform your relationship with this essential cooking ingredient.


